How to put skis on a ski rack and install it correctly

How to fit the ski rack and load the skis in the correct order

The resort car park at seven in the morning divides skiers into two categories: those who have their skis on the roof in five minutes and those who take everything apart and put it back together three times. Fitting a magnetic ski rack requires a clean, dry steel roof, two units 70 cm apart, the safety strap secured inside the passenger compartment and the skis loaded with their tips facing towards the rear of the car.

This guide is useful in two situations. First: the ski rack is still in the box, either newly purchased or taken out after a year, and you cannot remember the correct sequence. Second: you are considering buying one and want to understand how complicated it is to fit. The answer is contained in the Menabo fitting manuals, translated here into numbered steps: checks, installation, loading the skis, removal at the end of the day and the six most common mistakes.

What should you check before fitting the ski rack?

Three checks prevent almost every problem. The roof must be made of steel, be flat and be at least 125 cm long in the contact area. The ski rack and skis must remain within the maximum roof load specified by the vehicle manufacturer. You need a dry cloth and, for ski racks with an anti-theft system, the supplied key.

The roof comes first. The magnet only grips steel sheet metal: no panoramic glass roof or aluminium roof, and the base must never sit across a rib or a joint. The question are magnetic ski racks safe? is covered in a separate guide, including the magnet test. The choice between a magnetic rack and a roof-bar model is covered in another guide: here, that choice has already been made.

The second check is weight. The actual limit is the vehicle's roof load, stated in the owner's manual: as Sicurauto points out, the maximum roof load also includes the weight of accessories. The ski rack leaves some capacity: Aconcagua 5.5 kg, Himalaya 3.7 kg, Igloo 2.6 kg, Shark 4.45 kg, plus a maximum of 7 kg per pair of skis.

The third check is what you have in your hands: a dry cloth and, on Aconcagua, Shark and Himalaya, the supplied key. If you have a ski rack for roof bars, the bars must already be fitted and tightened: the roof-bar fitting guide explains how.

How do you fit a magnetic ski rack?

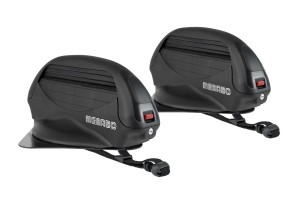
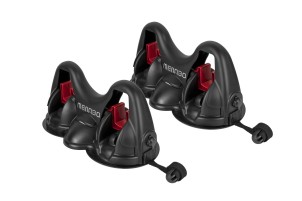
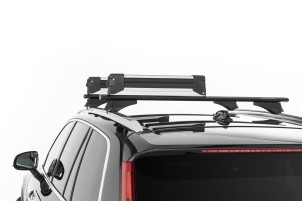
In four steps: clean the roof and place the first unit in the centre of the sheet metal; position the second unit 70 cm away and align it; pass the safety strap through the front door frame and tighten it from inside the passenger compartment; open the arms and check that both units are secure. This is the sequence in the Aconcagua, Himalaya, Shark and Igloo manuals for Menabo magnetic ski racks.

Step 1: clean the roof and place the first unit

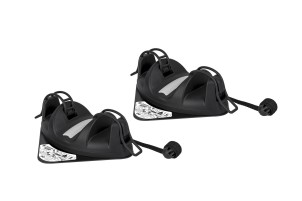
Wipe the contact area and the underside of the unit with the cloth: sand and salt left underneath can scratch the surface. Then place the first unit in the centre of the sheet metal, completely on the flat section. Never place it on the curved edge of the roof, over a rib or across the door frame.

Step 2: position the second unit 70 cm from the first

The distance specified in the manuals is 70 cm. The two bases must be aligned with each other, perpendicular to the direction of travel and centred on the roof. Two units positioned diagonally are among the mistakes illustrated in the manuals. Neither unit should prevent the doors or tailgate from opening.

Step 3: attach the safety strap inside the passenger compartment

The strap comes out of the base, enters the passenger compartment through the front door and is tightened from inside. The door is then closed over it. The mistake is to run it over the window glass: the strap must sit in the door frame, where the closed door locks it in place.

Step 4: open the arms and check the grip

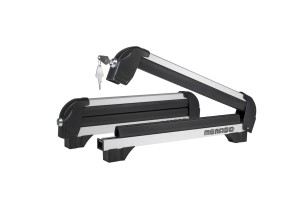
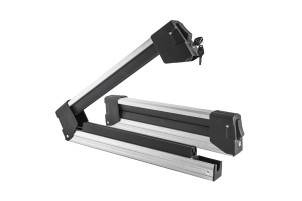
On Aconcagua, Himalaya and Shark, turn the key and lift the arm; on Igloo, release the two rubber straps from the teeth on the base. Before loading the skis, push each unit sideways. If it stays still, the grip is correct. If it slides, there is still sand or ice underneath the base: clean it and start again.

How do you fit a ski rack for roof bars, and when is the out-of-channel kit needed?

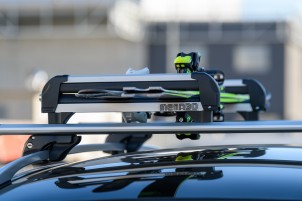
The ski rack for roof bars is attached to the already-fitted crossbars using T-bolts that slide along the profile channel. It must be centred on the roof without interfering with the tailgate. The out-of-channel kit is needed when the fixing cannot be inserted into the channel: it is fitted on the outside of the profile.

The roof bars come first: fit and tighten them according to their own manual. Then place the ski rack, centre it and tighten it until it can no longer slide along the bar. The exact sequence and tightening torques are given in the manual for the specific model. Iceberg and Yelo 4 NS carry 4 pairs of skis or 2 snowboards; Yelo Black carries 6 pairs of skis or 4 snowboards and has a sliding base.

The optional P.SCI Iceberg out-of-channel kit fits on the outside of the profile on bars up to 80 mm and is designed for Iceberg. For the Yelo range, there is the Yelo/Niagara out-of-channel kit for profiles up to 60 mm.

How do you load the skis onto the rack without damaging them?

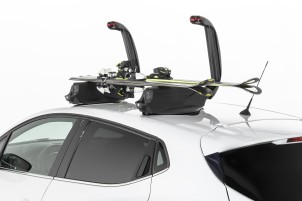
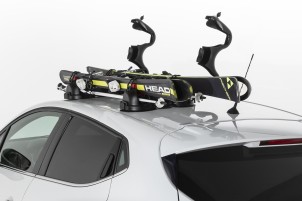
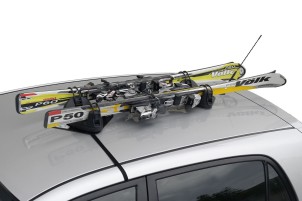
Tips towards the rear of the car, skis paired with their bases facing each other, bindings centred between the two units, a maximum of 7 kg per pair, arms closed until they click and locked with the key. This applies to magnetic ski racks and, following the same principles, to roof-bar models.

The tips facing the rear are specified in the Aconcagua, Himalaya and Igloo manuals and other ski-rack instructions, which list forward-facing tips as a mistake. The skis are loaded as a pair, with the bindings between the two units and the same amount extending beyond each side. The Igloo manual shows an off-centre load as a mistake and requires at least 40 mm of clearance between the skis and the roof.

Aconcagua carries 3 pairs of conventional or cross-country skis, or 2 pairs of carving skis, or 2 snowboards, with a 21 kg load capacity. Himalaya carries 2 pairs of skis and 2 ski poles; Igloo carries 2 pairs; Shark carries 2 pairs of skis, 2 snowboards, or 1 pair of skis and 1 snowboard. The load capacity for these three models is 14 kg.

Once loaded, close the arms until they click and turn the key. The anti-theft system locks both the ski rack and the skis on Aconcagua and Himalaya and is standard on Shark; Igloo closes with rubber straps and has no lock.

If the skis extend beyond the vehicle's outline, Article 164 of the Italian Highway Code applies: the load may not protrude at the front, must not cover the number plate or lights and must not compromise vehicle stability, with a fine of €87 to €344. The operating limits remain those specified in the manuals: 130 km/h with skis and 100 km/h with snowboards on the three models for which the relevant manual is available; for Shark, its own manual applies. The reason is explained in the guide on magnetic ski-rack safety.

How do you remove the magnetic ski rack at the end of the day?

In reverse order. Unload the skis, release the strap from inside the passenger compartment and lift each unit from one side using the release tab, without dragging it across the paintwork. Then dry the base and roof, clean the base of salt and sand and put both units back in the box.

Most scratches occur during removal. The magnet is released by lifting one side: the manuals show the hand pulling the release tab on the base. Dragging the base across the sheet metal is the easiest way to leave a mark.

The ski rack should not be left on the roof between outings. The manuals specify a maximum of 36 consecutive hours, prohibit leaving the units in sunlight above 30 °C, and prohibit washing the car with the units fitted. The TCS, the Swiss motoring organisation, adds that the rack should be removed when it is not needed, because even when empty it can increase fuel consumption by up to 1 litre per 100 km.

What are the most common mistakes when fitting the ski rack?

Six mistakes return every season: a dirty roof, the base placed on glass or across a joint, a forgotten strap, units that are too close together or crooked, tips facing forwards and a ski rack forgotten on the roof. Each has a one-minute countermeasure.

  1. Dirty, wet or icy roof: wipe it before placing the bases; if there is ice, wait until it has been removed.
  2. Base on glass, aluminium or across a joint: use only flat steel sheet metal where a refrigerator magnet will stick.
  3. Strap forgotten or passed over the glass: it must enter through the front door frame and be tightened from inside.
  4. Units too close together or diagonal: 70 cm between the bases, aligned and perpendicular to the direction of travel.
  5. Tips facing forwards: the tips face the rear window and the bindings sit between the two units.
  6. Ski rack forgotten on the roof: low barriers in car parks, car washes and the 36-hour installation limit are the three situations highlighted by the warnings.

There is one more check after the first few kilometres: the TCS recommends stopping after approximately 50 km to check the straps and fixings.

If the ski rack is not yet in the boot, find the ski rack compatible with your car using the vehicle selector: enter the make and model to see the ski racks suitable for your roof, whether magnetic or designed for roof bars.

Five minutes in the morning are worth the whole day in the snow.

FAQ

Can skis be carried on the roof of a car?

Yes, using a ski rack designed for that purpose, either magnetic or designed for roof bars. The load must remain within the manufacturer's stated weight limit, must not protrude from the front of the vehicle and must not cover the number plate or lights, in accordance with Article 164 of the Italian Highway Code.

Which way should the ski tips face on the ski rack?

Towards the rear of the car. This is the instruction given in Menabo's fitting manuals, which show skis with the tips facing forwards as an incorrect setup. With the tips facing backwards, the bindings remain between the two units and the raised part of the ski presents less surface to the airflow.

How long does it take to fit a magnetic ski rack?

Only a few minutes, with no tools required. The preparation requires more attention: the roof must be clean and dry, the units must be positioned 70 cm apart and the strap must be tightened inside the passenger compartment.

How far apart should the two units of a magnetic ski rack be?

They should be 70 cm apart, aligned with each other and perpendicular to the direction of travel, on a flat section of sheet metal at least 125 cm long. They must never be positioned diagonally or across a rib or joint: the manuals show both situations as incorrect setups.

How do you remove a magnetic ski rack without scratching the roof?

Lift it from one side rather than dragging it. First unload the skis and release the strap, then lift the unit by pulling the release tab on the base and clean the base to remove salt and sand. Scratches are caused by dragging with sand trapped underneath, not by the magnetic grip itself.

Comments (0)

No comments at this moment

Made in Italy Leisure Time Car Accessories

Menabo is the Italian brand appreciated for its distinctive design and superior quality. For over 50 years, we have been producing car accessories such as bike racks, ski racks, roof boxes and baskets, roof racks, and water sport solutions. Each of our products, made entirely in Italy, is certified according to the strictest safety standards. Innovation, safety and quality are our main goals, guaranteeing customers reliable and stylish accessories.

Menabo Quality and Safety

Every detail of Menabo's products is carefully considered, from design to production. Our accessories for pick-ups, commercial vehicles, 4x4, and garage organisation, as well as backpacks, bags and outdoor living solutions, reflect our commitment to quality. Made from selected materials and subjected to rigorous safety tests, Menabo products represent the excellence of Made in Italy for leisure and sport. 

download the catalog

customer care

Download our catalog to stay up-to-date on all new product releases.

Do you need help?

For faster assistance, please contact us by email at: customercare@flli-menabo.it, always including the batch number and part codes. The same information is required for phone support at +39 0522 1750280 (Hours: 8:15–12:15, 12:45–16:45).

download the catalog

Download our catalog to stay up-to-date on all new product releases.

customer care

Do you need help?

For faster assistance, please contact us by email at: customercare@flli-menabo.it, always including the batch number and part codes. The same information is required for phone support at +39 0522 1750280 (Hours: 8:15–12:15, 12:45–16:45).

Product added to wishlist